Color Translations
Color can convey a mood, describe a reality, or codify information. Color serves to differentiate and connect, to highlight and to hide. — Ellen Lupton
Create a series of color schemes for your translations using the Adobe color tool.
1
Make an Adobe account to save your colors and bring them into illustrator:
2
Log into the Adobe color tool site at: https://color.adobe.com
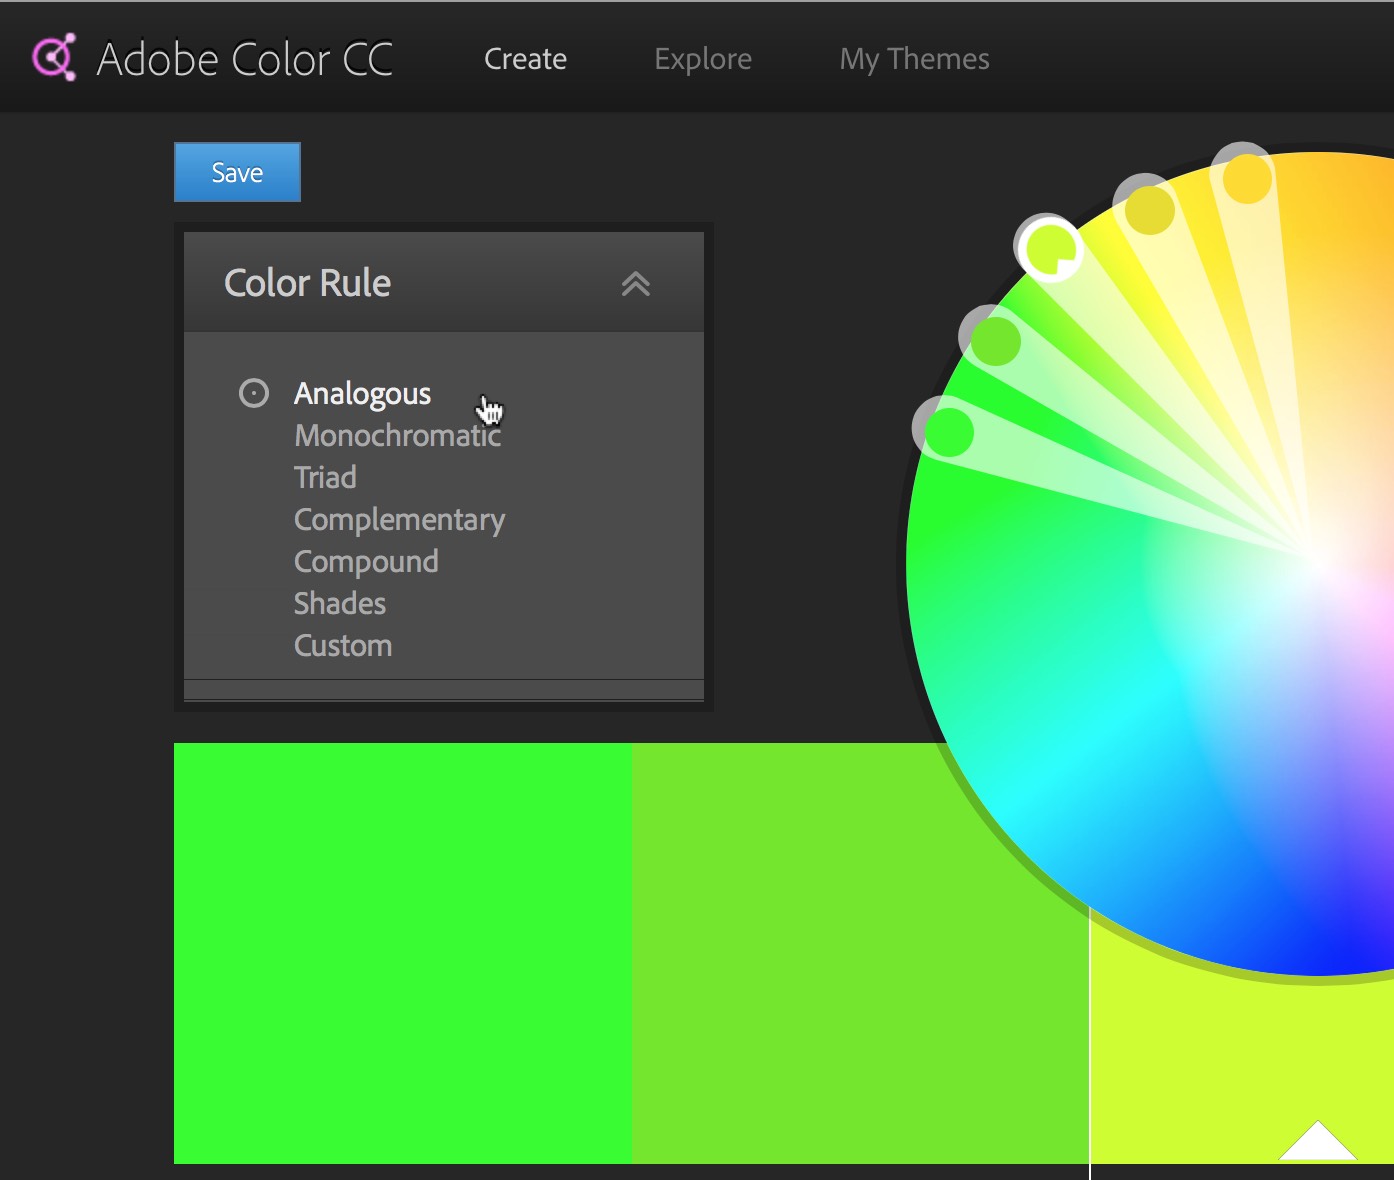
Experiment and create color schemes in the categories below:
- Analogous
- Monochromatic
- Triad
- Complimentary
- Compound
- Shades
Use these abbreviations to name the color themes:
- Analogous = analog –
- Monochrome = mono –
- Triad = triad –
- Complimentary = comple –
- Compound = compo –
- Shades = shade –
- Custom = custom –
For example, name your colors with a prefix of the color type and a descriptive and interesting name :
- analog – rusty nails
- compo – scissor fight
- comple – iguana explosion
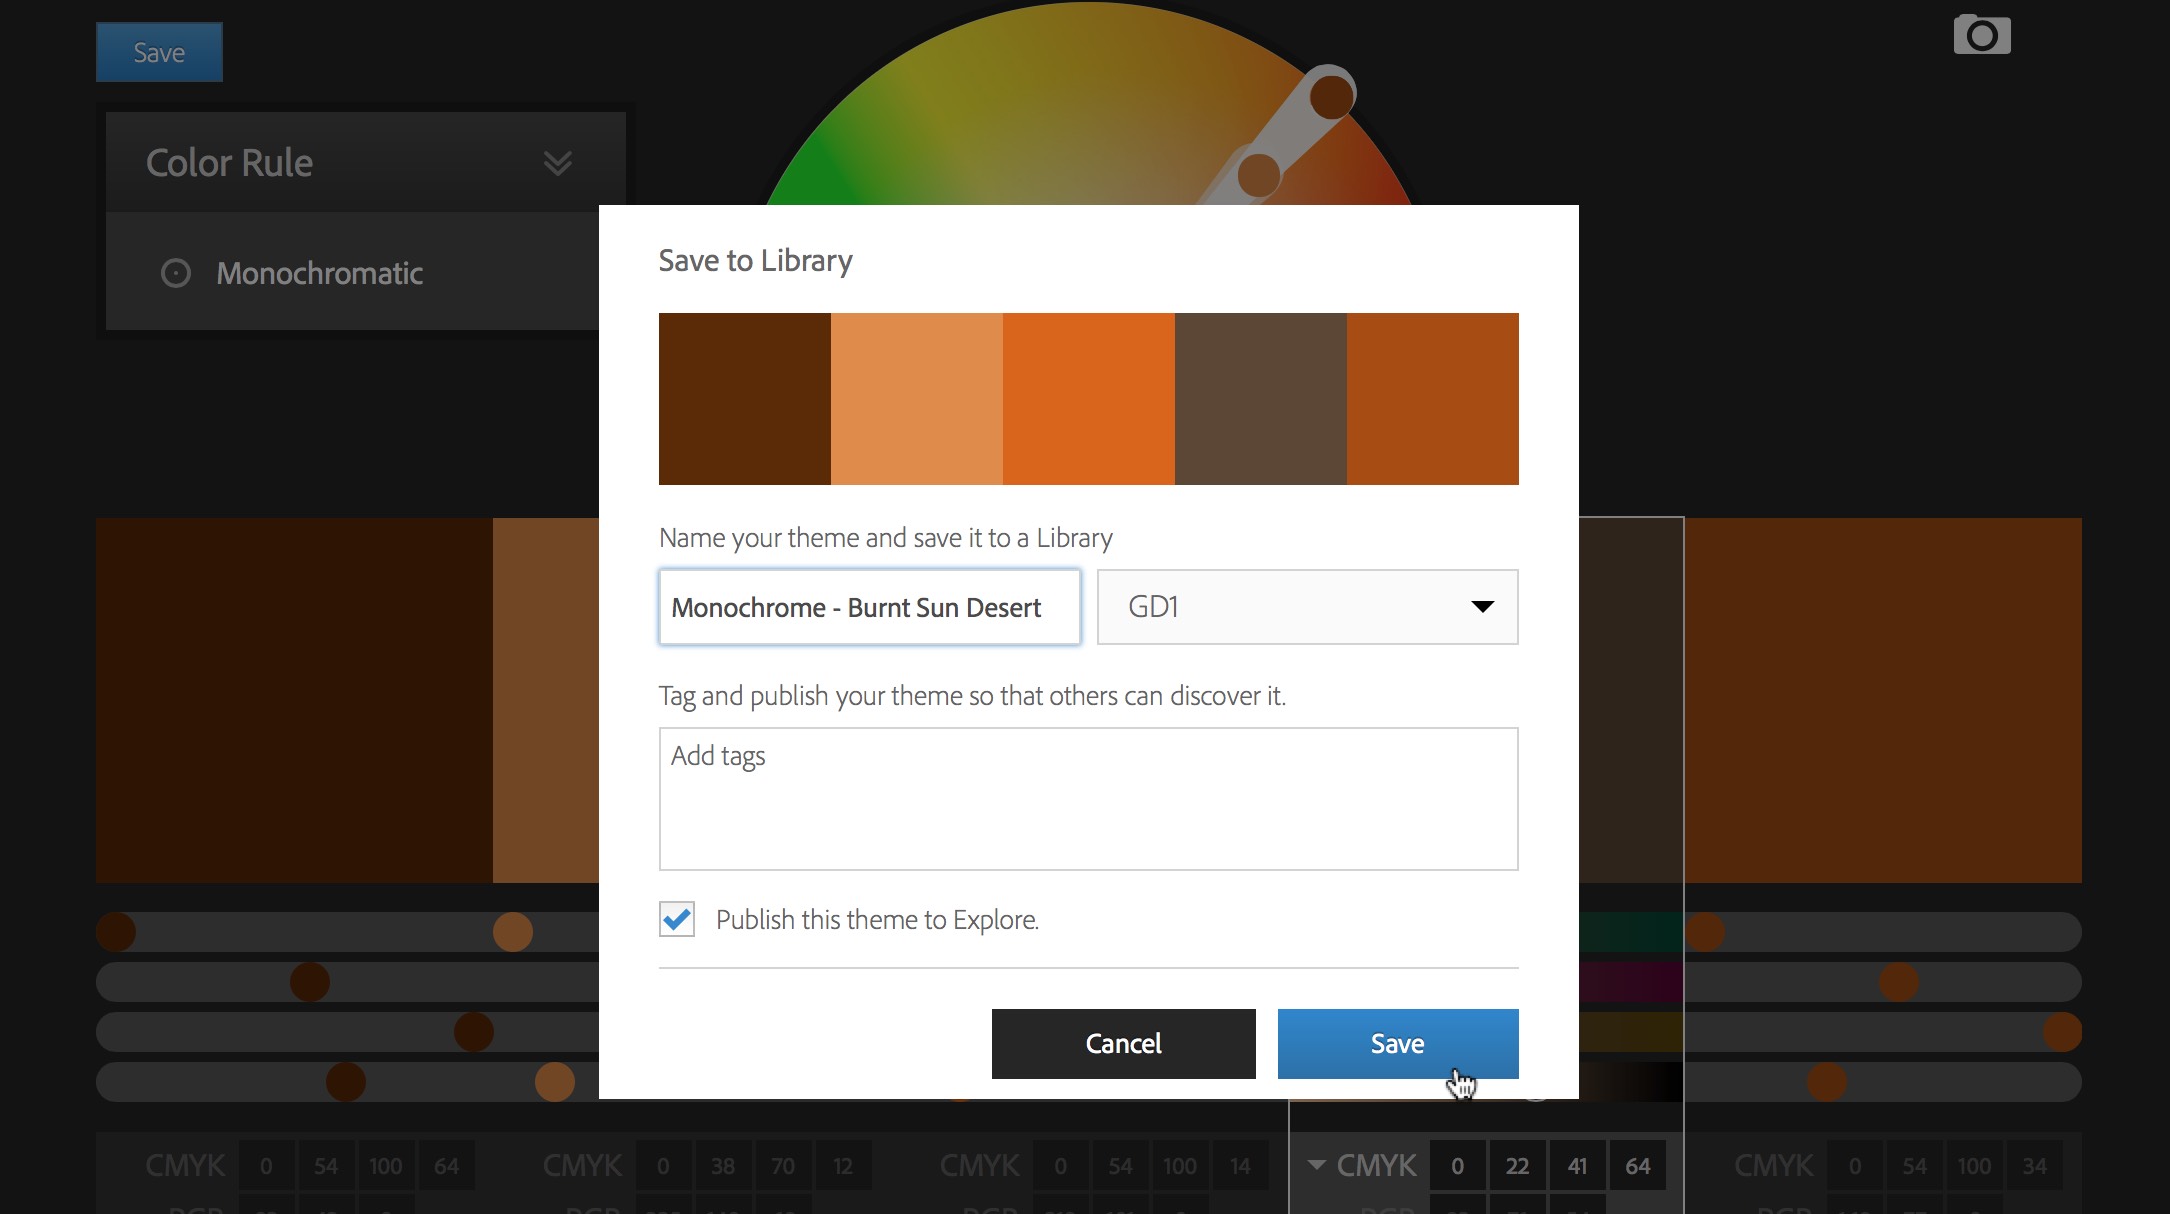
3
Save your color schemes with playful and interesting names such as analogous – green tea diffusion, or monochrome – burnt sun desert. Look at how colors are named for paints such as Behr. Create at least one color scheme in each category to start.
4
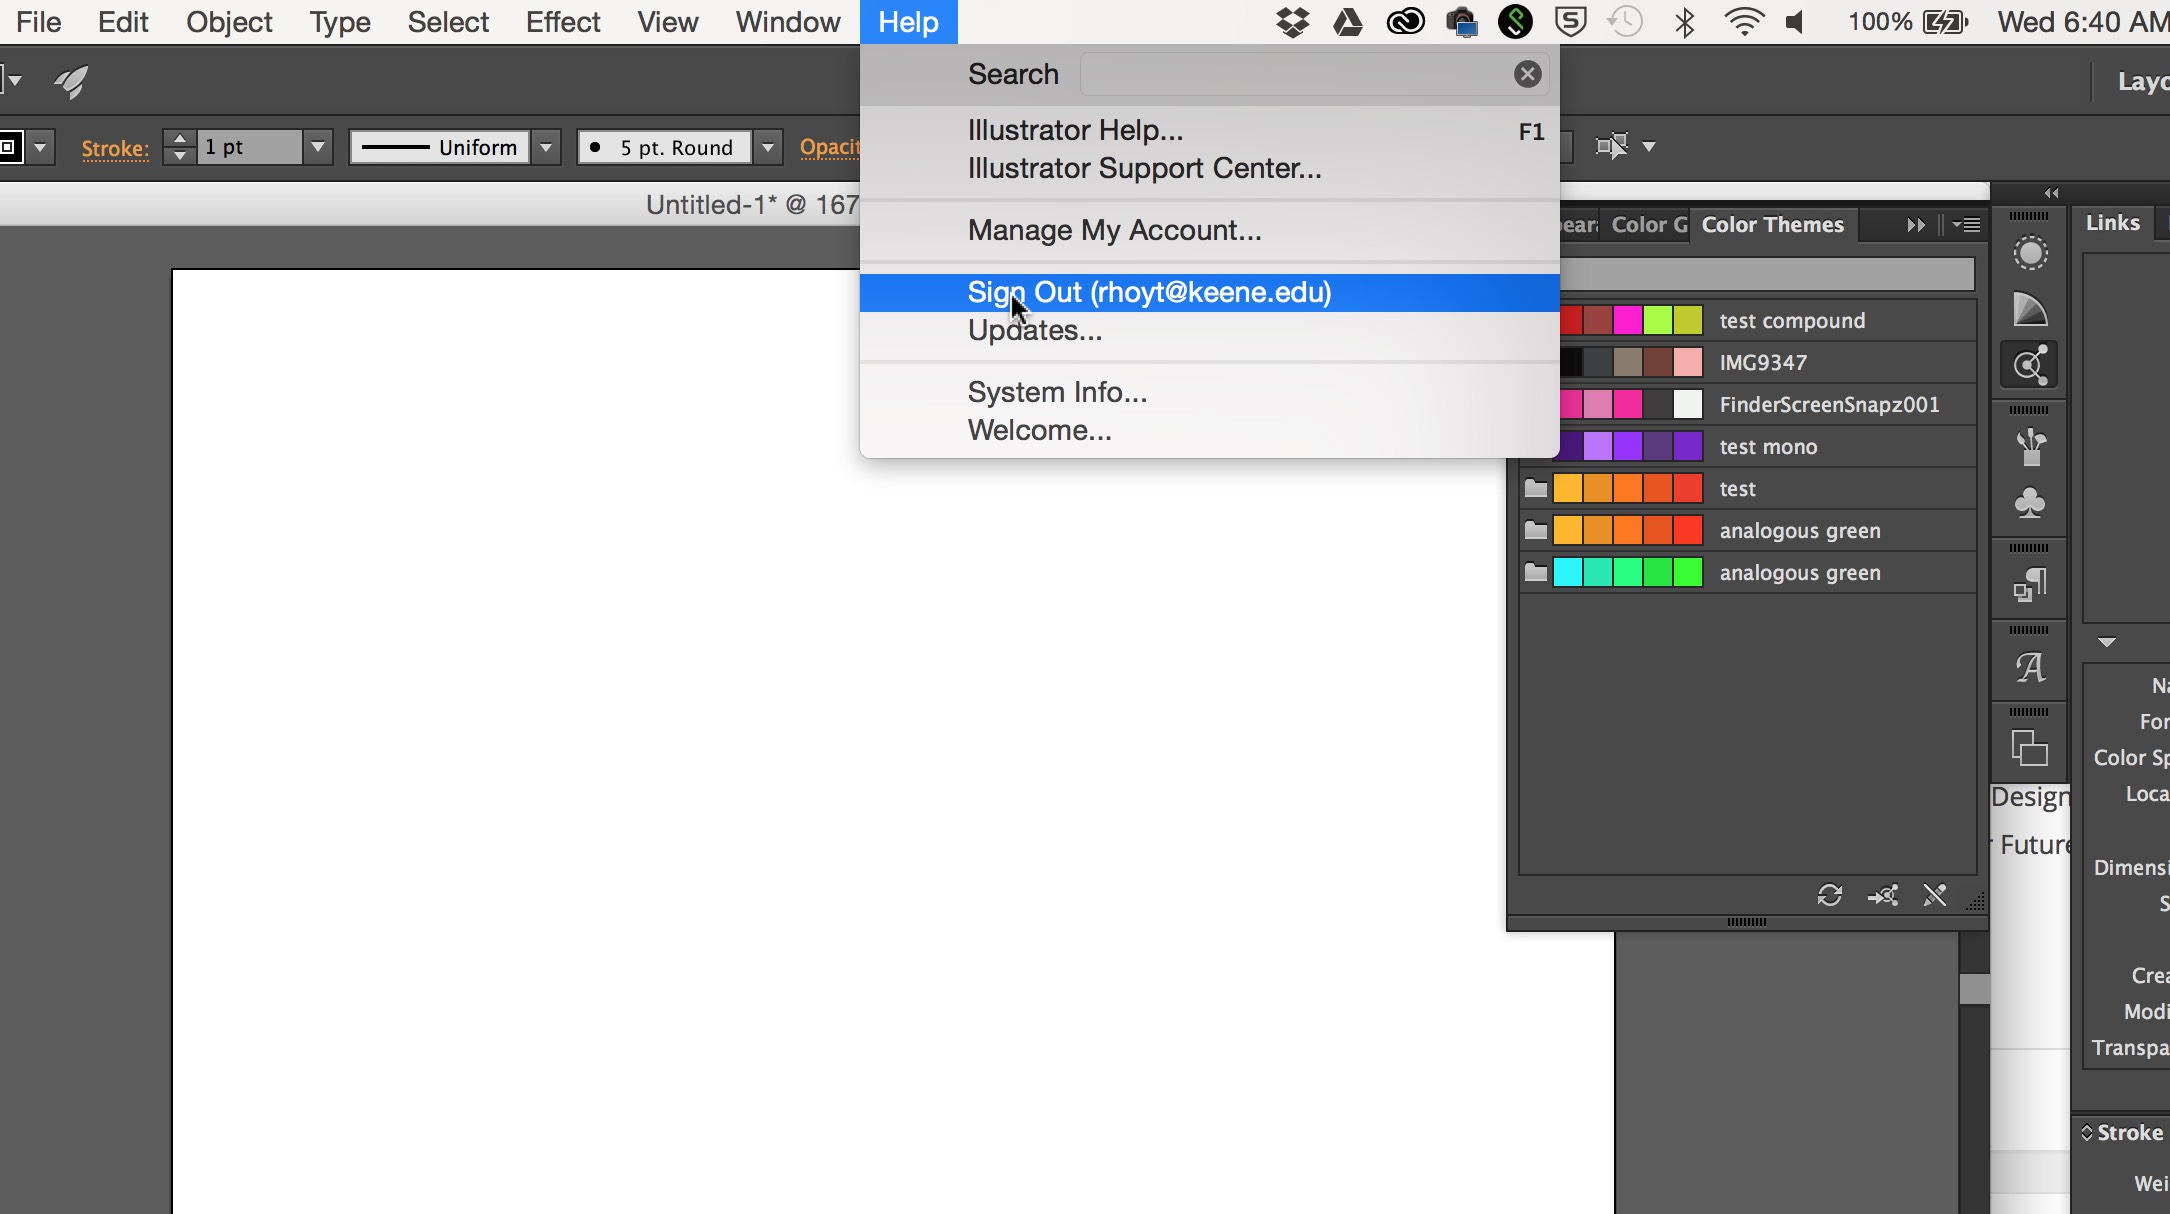
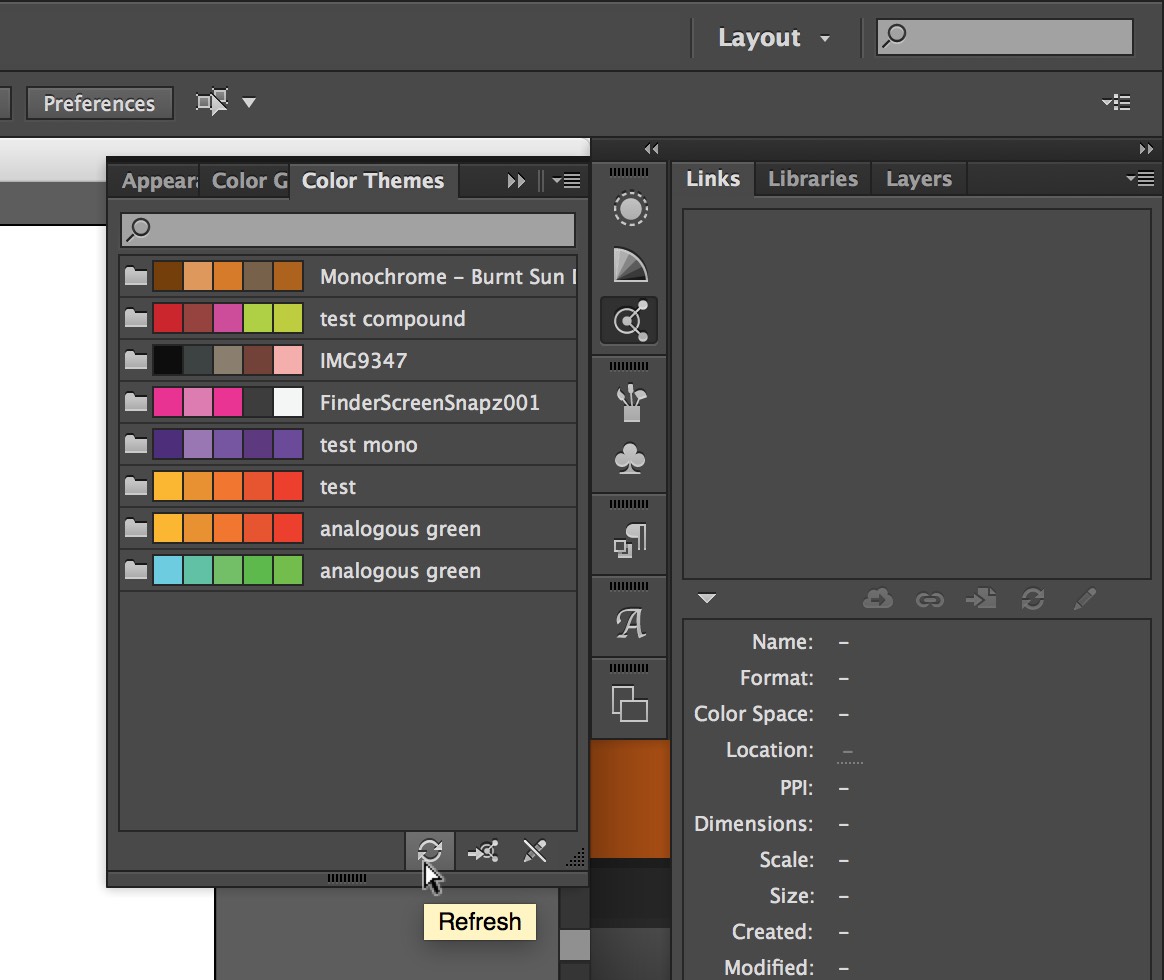
Open Illustrator and sign in with your Adobe account in the Help menu. Your colors should appear in the “color themes” panel. Press the Refresh button to update the panel.
5
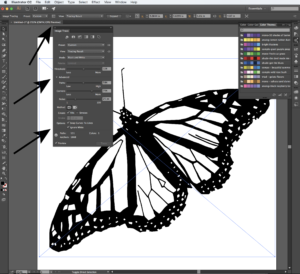
Auto-Trace your previous hand-drawn translations #2-#7 into vector art in Illustrator.
- Place your .psd scan onto blank page in illustrator file
- Convert the bitmap image into a vector drawing using “live-trace”.
- Select LiveTrace on top option bar-Check Image Trace Panel (this is the button inbetween Preset and View Panels)-Click on Advanced Tab-Check Ignore White–Click Expand on the top option bar under menu.
- This will give you a vector image that you can colorize now.
- #1 (your original photo) and any stippled image cannot be done this way. It requires a different technique which we will cover on Thursday in class.
6
Build a new ‘color translation’ illustrator file.
- Create a new 6″x6″ Illustrator file and name it “last_first_color_translation.ai”.
- Copy your master photograph to a ‘photo’ layer for positioning.
- Copy more translations from your master file into it to color. Place these on a new layer.
- Create a 6.25 x 6.25 solid background square behind it. Make this a new layer. Start by layering two translations on top of each other. This box is slightly bigger to accommodate bleeds for accurate trimming.
- Be sure to position them exactly in the same place in the square. “Paste in Front” under Edit Menu will do that. (Command-F)
7
Using only two colors for images and one color for background box, create a series of color translations using each of the color types as follows:
- 5 Different Analogous
- 5 Different Monochromatic
- 5 Different Triad
- 5 Different Complimentary
- 5 Different Compound
- 5 Different Shades
Use one type of translation for each set. Each set must use the same translation.
8
Make a total of 30 color translations — 5 for each type of color (analogous, complimentary, etc.) organized in illustrator and export these as one PDF.
9
Make a total of 10 more color translations — (using your #1 original photograph and #7 stipple translations) — after making them bitmaps in photoshop, then organize in your illustrator final color translations file and export these as one PDF.
- Open your .psd scan of original photograph #1 or stipple #7 in photoshop
- Convert this file into a bitmap image by choosing Image–Mode—Bitmap. If Bitmap is not available to select, then choose Greyscale first, then Bitmap.
- Keep dpi at 300 and do the following four example of bitmaps: 50% Threshold, Halftone Screen—Round, Halftone Screen—Line, Diffusion Dither. You can change the options for the Halftone screens only.
- This will give you a vector image that you can colorize now once placed in Illustrator.
- Place these into your final color translation file in Illustrator and do 10 more color translations using these 4 new bitmaps.
10
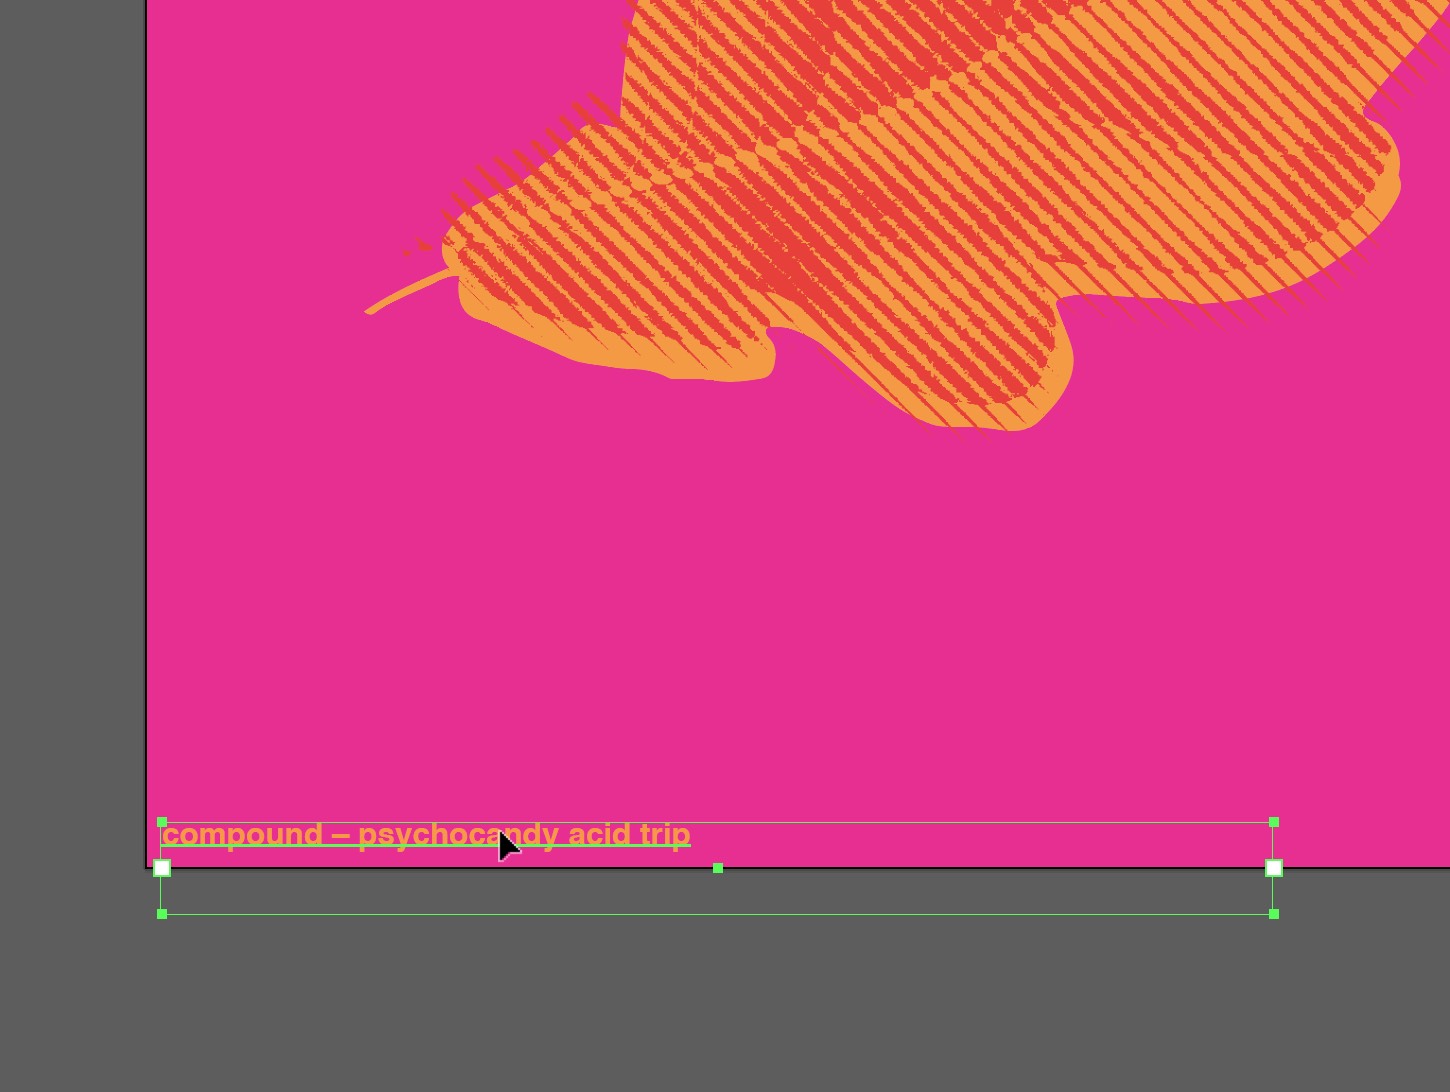
Put the full name of each color theme on the bottom left corner of each design. The type should be colored with the theme colors (not black or white) and set as follows:
- font: Helvetica Bold
- size: 7pt
- color: according to theme
- Sample PDF test_leafcolor
Due Thursday, March 30th
- One PDF with a total of 30 color translations posted to DropBox before class. Name them as follows:
Two-Color Translations/lastname_2color.pdf- Read and comment to the Color Readings page. by Wednesday night at 6pm (If you have not already done so)
- NOTE: You don’t have to print these out for Thursday.
Due Thursday, April 6th
- One PDF with a total of 40 color translations posted to DropBox before class. Name it as follows:
Two-Color Translations/lastname.pdf- Color Prints due! 9 total. 1 choice from each of the 6 color themes=6 + 3 wildcards for a total of 9. These are cut and placed in a manila envelope, due at beginning of class.

Leave a Reply
You must be logged in to post a comment.