-

- original
-

- onion skin
-

- quick mask
-

- on black
-

- on white
-

- white on black mask
-

- with background
-

- fuzzy masking to fix
The capability to create advanced selections in Photoshop is truly mind blowing, it’s incredible how far the technology has come. For the longest time, every Photoshopper’s worst nightmare was having to select hair. In the past few years, this has fortunately changed 🙂
The Select and Mask Feature
The gallery of images above show the visualization modes for the “select and Mask” feature of Photoshop. When you are done with your selection process make sure you export to a new layer with a mask.
-
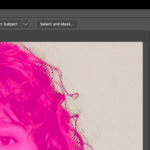
- Click “Select and Mask”
-

- export as a layer with mask
-

- result
Tutorial
Read this article: Select & Mask.Links to an external site.
Watch this video from the article above:
Watch this video Also
Find your own Select and Mask Tutorials
Instructions:
- Download the the ZIP: Advanced_Selection_Images
- Select three images from the you will work on in Photoshop.
- Shoot one gnarly masking photo of your own
- You will remove the primary subject from each of the attached photographs
- Add a new background from the folder “backgrounds”
- You will do this four times (see below).
- Have fun with this!
- Upload to Dropbox (see below)
- No need to post them to the site.
Due Tuesday, March 10
Four Images with hair removed from their backgrounds and put on another background. Try some of the supplied backgrounds. Try one of your own.
- One human assigned
- One Nonhuman assigned
- One of either that you choose from the set
- Shoot your own intriguing photograph with hair to select. Your hair. A friend. Plush toy? Other furry thing?
Shoot of select a background on line.
Once you have done this add different backgrounds to each image.What does the different background do to the image?
Upload you files to a new DropBox Folder: 07 SELECT and MASK
Save the files as .jpgs with the following names:
lastname_selectmask_01.jpg
lastname_selectmask_02.jpg
lastname_selectmask_03.jpg
lastname_selectmask_04.jpg