- Â
å Thursday, September 10th, 2015
í Tool Montage : Tools of the Near Future
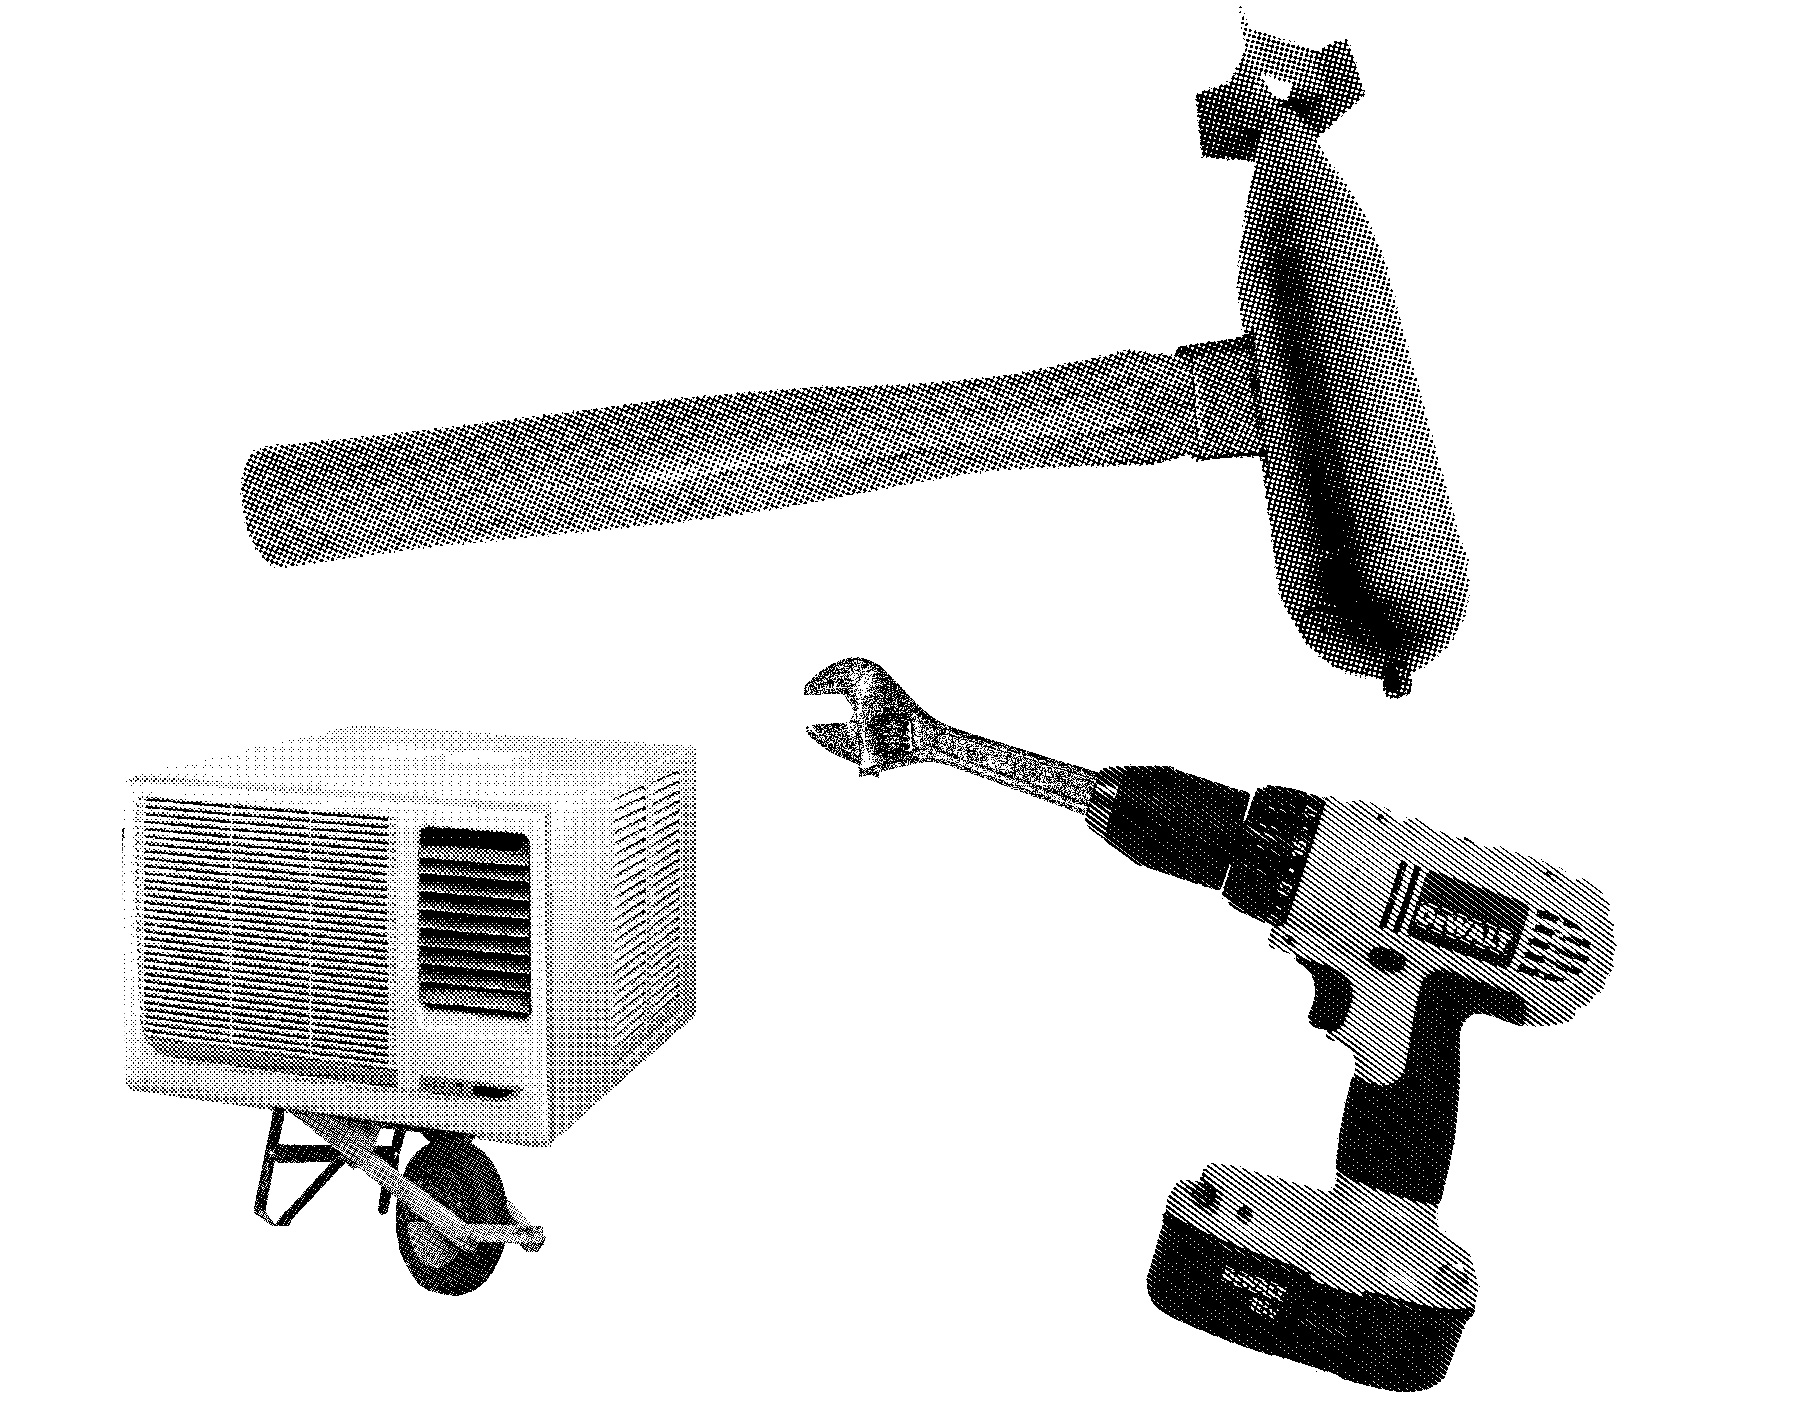
Design a series of 5 new “Tools of the Near Future” that solve problems that (may or may not yet) exist now. These tools should have plausible functions based in a specific context (for example: brushing your teeth while bike riding). The tool doesn’t have to be practical however and you are free to express implausibility and whimsy. Remember, this is about tools right? 🙂 Be prepared to answer these questions:
What problem does it solve?
How does it do it?
What is it called?
Build on your Previous Research
You can make tools from ideas you have already have or think up new ones. Go back to your Mind Maps to find new words and ways to look at the problem or make a new mind map to get you thinking differently. Write down twenty more tool pairings.
Make Thumbnails for 10 ideas
Select 10 of those tool pairings to explore with thumbnails. Make 3 sketches of each of your 10 tool combination ideas. You will have 30 sketches, or three sheets when you are done. Each sketch must be a completely different idea from the last one. Use different angles of tools for variety.
Use this template for your thumbnails
Choose 5 Tools to Create
Select 5 Tool Combos from your 10 thumbnails and make them using PhotoShop bitmaps in the program Illustrator.
The steps to prepare the images are :
- Collect Images: For both tools in your tool pair hybrid you will need 3-5 images of each (different types & angles)
- Medium Size: Source images should be between 600-1500 pixels (not to small, not too big)
- Number of Source Images: For 5 tool combos you will need approximately 30 images. This means that 5 pairs comprised of 2 different tools = 10 unique tools to research. For each of the 10 you need 3 images of each = 30 source images.
- Choose wisely: Think about the ways that the tools can combine. Sure a flat side view works but can you use dynamic angles to create more interesting final images.
- Find Interesting images: The best tool images may need to be separated from the background. Some tools will be silhouetted already, but many of the interesting ones will not. Don’t be afraid to work a but to silhouette the tool.
- Turn the images into bitmaps using only HALFTONE functions (not dither or 50% threshold). Keep the dot patterns noticeable but not too chunky or fine. We want all the images to be able blend well so very course halftones and very fine ones won’t mix well.
- Create bitmap photoshop .PSD images for each of your source images and save them with names that informative : your initials + tool + dot pattern + .psd = RH_hammer_19round.psd
- Watch these tutorialsIsolating and Enhancing Images for BitmapThere are 25 minutes of instruction that will show you what you need to know.
Isolating and Enhancing Images to Make Bitmaps / Part 1
Isolating and Enhancing Images to Make Bitmaps / Part 2
- Bitmap Format: All images must be BITMAP and saved as .PSD.
- Separate in Folders: Save all Bitmaps separated from your source .JPG files from the web
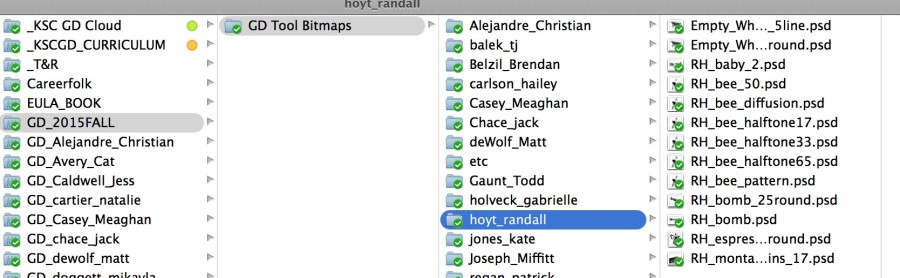
- Name them Correctly: All shared images must be prefixed with your initials…”RH_hammer_19round.psd”
- Upload and Share: Create a folder for yourself on DropBox in “GD_2015FALL” and upload your bitmap photoshop (.PSD) images to “GD_2015FALL / GD Tool Bitmaps / [ last – first ]”
Build your Tools of the Near Future in Illustrator.
- Create a new illustrator file that is 6″ x 6″
- Import your images using: command + shift + ‘p’ / DO NOT DRAG AND DROP…
- Combine the images in creative ways. There should be only two images combined, but you may repeat one if necessary.Clipping Paths for Bitmaps in Illustrator
- Use the Menu : Objects > Clipping Mask > Make to hide parts of your images.
- You will need two (or more) variations of each of the future tools. Combine the tools in different ways or use different images to express the idea.
- Make a folder called “02_Future Tool” in your own Personal DropBox for your final illustrator Tool Montages.
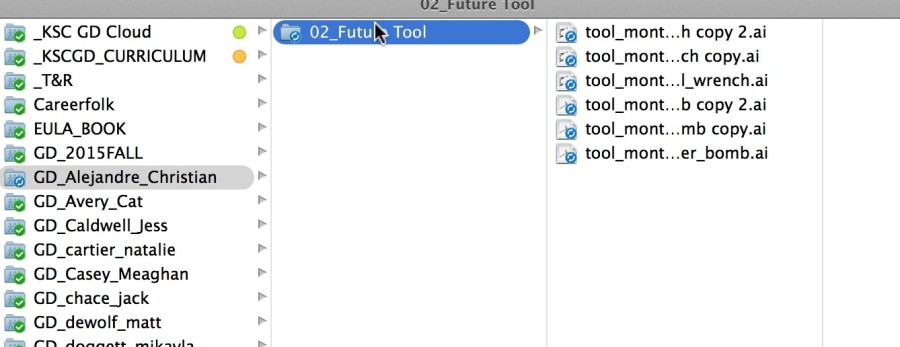
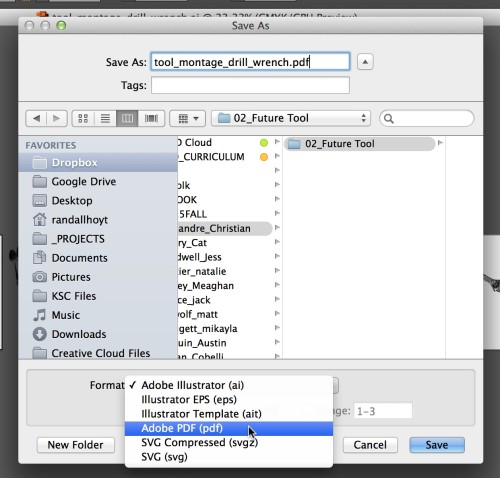
- Save all Illustrator files as .PDF (not .ai)
Have fun and ask questions if you have them.
Due Monday, Sepetember 9
- Thumbnails for 10 tool pairings ready to hand in (photocopy from sketchbooks if necessary)
- 5 PDFs with 2-3 versions of each future tool saved in a folder called “02_Future Tools” in your own Personal DropBox.
- 5 more Future Tools created with classmates images saved as PDF in “02_Future Tools” in your own Personal DropBox.
- All tool bitmap files saved in your folder on DropBox: GD_2015FALL / GD Tool Bitmaps / [ last – first ]
-
Classroom
-

Leave a Reply
You must be logged in to post a comment.